How to record screen on Windows 8 or earlier versions? This question is relevant for anyone who doesn‘t want to install Windows 10 and degrade performance on rather modest computers.
The answer is AVS Video Editor.
Why record your screen on Windows 8 / 7 / XP
There are four most common reasons to create videos taken from the desktop of your personal computer:
- Make tutorials with explanations,
- Save the full video call or conference,
- Capture gaming process,
- Send screen records to tech support.
You can capture a screen with or without audio, a particular window or area, and even draw in real-time. Here is how to do it with AVS Video Editor.
How to record screen with AVS Video Editor (Windows 7, 8, 10, XP)
Follow these simple steps to create a clip with the content on your desktop using AVS Video Editor.
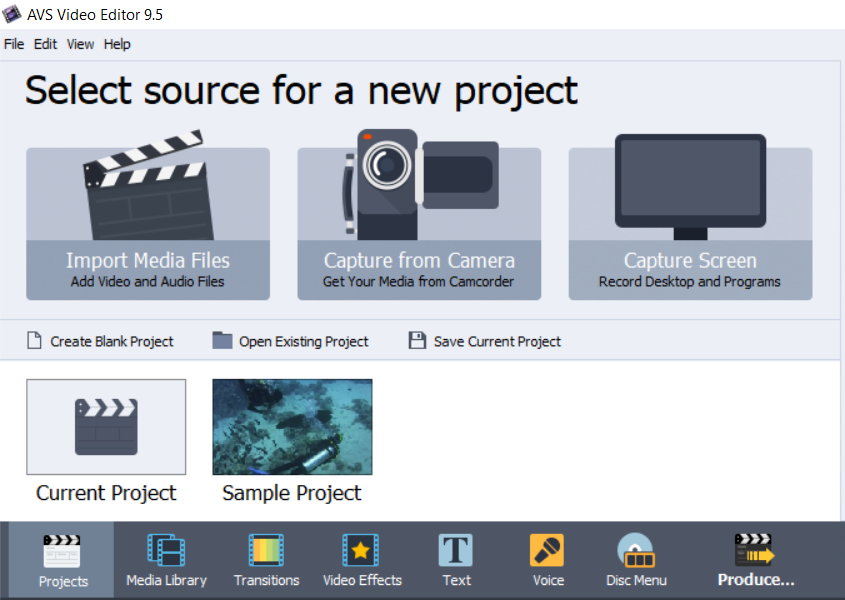
Step 1. Open AVS Video Editor and click Capture screen.

Step 2. Choose Full screen to record every file, folder, and even the side panel.

Want to hide some details and only show the active window? Click Selected window.
You can also demonstrate a custom area in the video file. Click Selected area.
Step 3. Tap on Start Capture.
Step 4 (optional). Click Drawing and select the desired drawing tools, color, and thickness.

Now you can underline elements on the screen and illustrate anything like in Khan Academy lessons.
Step 5 (optional). To record the screen without your voice, go to Settings -> Audio and uncheck Record audio.
Start making descriptive tutorials with screen recordings in AVS Video Editor today!
Watch this video to explore how to capture a screen while playing a video game with AVS Video Editor.
In AVS Video Editor, screen capturing is possible even on older Windows versions, such as XP or Vista.
How to record screen with Wondershare DemoCreator (Windows 7, 8, 10)
In DemoCreator you can also capture a screen on Windows, but starting with Windows 7 and later versions.
Step 1. Run the app and click Get Started to make necessary adjustments.

Step 2. Enable Audio in the corresponding tab, if needed. Optionally, you can alter the area for capturing, frame rate, video quality, etc.
Step 3. Click Capture and then a recording button in the opened window.
Apart from screen recording, Wondershare offers a full pack of multimedia apps within the annual plan. Prices start from $61.99.
Recording screen with OBS Studio (Windows 8, 10)
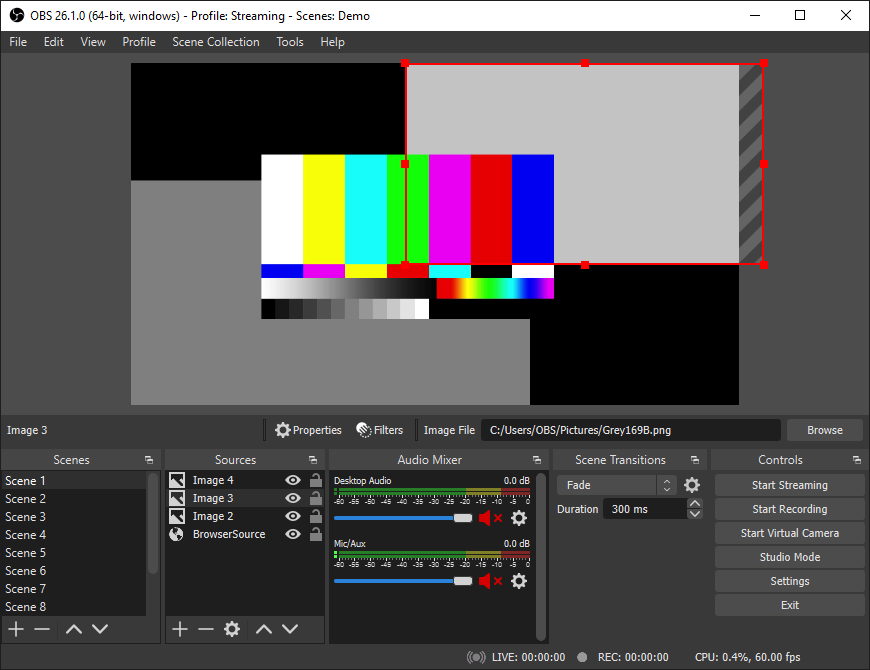
OBS Studio is a professional solution for online streaming and screen recording. It is cross-platform and available for Windows 8, 8.1, and 10.
The interface of OBS Studio may seem complicated to novices, but screen capturing is just that easy.
Step 1. Open the app, go to Sources, click the plus button to add the Display Capture option.

Step 2. Do the same to choose the audio you want to be recorded.
Audio Input Capture stands for your voice coming to a microphone. Audio Output Capture is every sound on a computer.
Step 3. Click Start Recording.
Recording screen with ScreenRecorder (Windows 7, 8, 10)
Microsoft offers a native app to record screen on Windows 7 and later versions for free. Go to the official website of Microsoft to download and install the executive file.
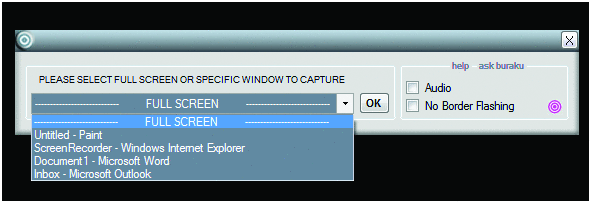
Step 1. Run the program and choose the part of your screen you want to record.

Step 2. Check the Audio box to enable sound in the output video.
Step 3. Click OK and then Start to capture the screen in WMV.
Conclusion
Now you know how to record what is on your screen on Windows 8, 7, and XP using four different apps — AVS Video Editor, Wondershare DemoCreator, OBS Studio, and ScreenRecorder. It can be useful for video tutorials, materials for self-paced learning, recording video calls, and much more.
Longer videos can require a lot of storage. Read our recent blog post about how to reduce video file size.
Useful links
How to create demo and guides in AVS Video Editor. Learn more
How to add music to the footage in AVS Video Editor. Learn more
Crop clips on any operating system. Learn more
Top 10 Windows software for editing movies. Check now